atlas docs
My personal notes and documentation
Python
Python installation, pip management, virtual environments, and creating distributables
Git
Version control, GitHub integration, pull requests, and repository management
SSH
SSH key generation, authentication, and secure connections
Python
Updating Python
Before updating python, it is a good idea to check your current version.
You can do this using:
> python --version
Python 3.12.4
If your install is not up to date, go to the official python page, and download the latest version for Windows.
When running the installer, make sure to select the option to add python to PATH, as shown below.
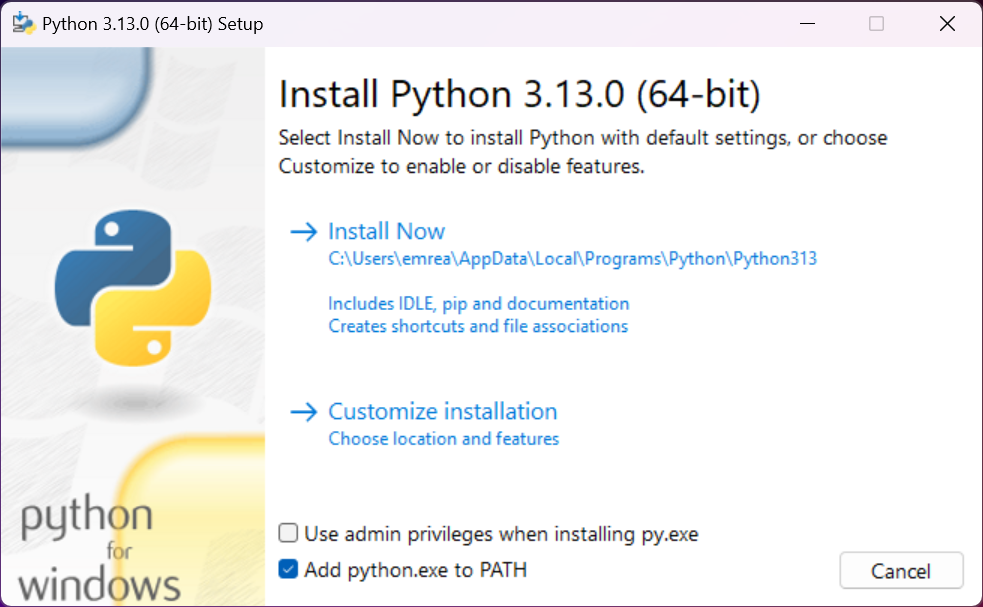
Python installer options - make sure to check "Add Python to PATH"
In the installer, you will either see an option to 'Upgrade Now' or 'Install Now'.
For 'Upgrade Now':
If you see the option to 'Update Now', then good news! The installer detected your old version of python, and you can select upgrade. Once you follow the instructions on the installer, go back to your terminal and check the version of python again:
> python --version
Python 3.13.0 (new version)
Now the update is complete!
For 'Install Now':
If you see the option to install instead of upgrade, that means the installer hasn't detected your old version of python. Not to worry. Simply follow the instructions in the installer. This will install the new version of python.
At this point, if you are OK with having multiple versions of python installed on your machine at the same time, then you can log off. However, in my (limited) experience, this can create problems, such as pip linking to a specific version of python. Although these problems can be managed, we might as well avoid the problems entirely by only keeping the latest version installed, especially as backwards compatibility shouldn't be a problem.
In order to see the different versions of python installed on your machine, run:
> py --list
 -V:3.13 *        Python 3.13 (64-bit)
 -V:3.12          Python 3.12 (64-bit)
Here you can see that I did successfully install 3.13, the new version, however the older version 3.12 is also installed. For reference, the asterisk indicates the default version.
If I now want to uninstall python3.12, I can simply do so by uninstalling it in the Windows settings, just like I would a normal program.
Once this has been done, you should be good to go! You can use the commands outlined earlier to check your installed version of python.
Using pip
pip is a package manager for python. We can use it to install packages we need to use. It is a good idea to read the section on virtual environments before installing packages using pip.
Updating pip
You can update pip (itself) using:
python -m pip install --upgrade pipLibraries I use
- numpy:
python -m pip install numpy - pandas:
python -m pip install pandas - sklearn:
python -m pip install scikit-learn - matplotlib:
python -m pip install matplotlib - seaborn:
python -m pip install seaborn - jupyter:
python -m pip install notebook
Project requirements
It is common for a python project to list the pip packages it uses in a file named requirements.txt.
All required packages can be installed using:
pip install -r requirements.txtUpdating pip packages
To update libraries installed using pip, use: pip install --upgrade package_name.
Check installed packages and versions
To check the installed packages in your current environment, as well as their versions, use python -m pip freeze.
Check a specific package
To check whether a specific package is installed (and its version), use pip show package_name.
Virtual environments (venv)
Virtual environments, typically shortened to venvs, are an extremely useful tool in python. They allow you to install packages for one specific project without having them installed globally. They also create a recreatable and shareable environment for running your code.
Creating a venv
In order to create a virtual environment, navigate to the directory in which you would like to have the venv, then run:
python -m venv venvActivating a venv
In order to activate a venv, we must run the activate script, located in the Scripts folder.
Since I use PowerShell on Windows, I run the Activate.ps1 script with:
./venv/Scripts/Activate.ps1This is what it should look like. The (venv) at the beginning of the line indicates that your virtual environment is active.
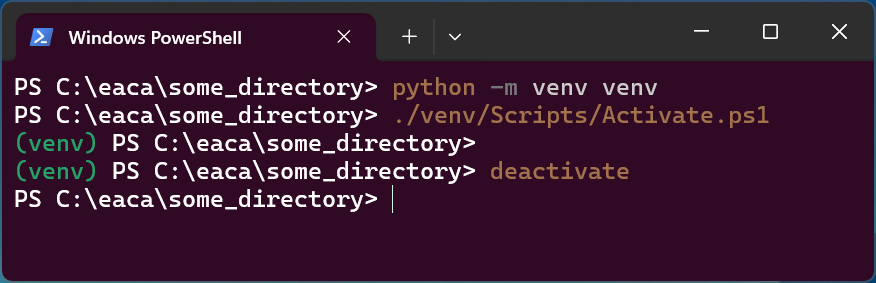
Virtual environment activation in PowerShell
If you're using PowerShell, you might run into the error ...execution policy.
If that is the case, run:
Set-ExecutionPolicy -ExecutionPolicy RemoteSigned -Scope CurrentUserDeactivating a venv
You can deactivate a venv with:
deactivateCompiling a release
Installing PyInstaller
We can "compile" our python file into a system binary (.exe file) to publish as a distributable release.
In order to do this, we need the pyinstaller library.
To check whether it is already installed, use:
pip show pyinstallerIf it is installed, you should see:
> Name: pyinstaller
> Version: 6.11.0
> ...
Otherwise, install it using:
python -m pip install pyinstallerCreating a distributable
Once this step is done, we can compile our python script using:
pyinstaller --onefile your_script.pyOptions:
--windowedto omit the cli for a GUI application--icon=iconName.icoto add a custom icon for the executable--name NameOfExecutableto give the dist a custom name
Git
Installing git
Download and install git from the official website.
Updating git
Check your current version by running:
git --versionIf not up to date, download the latest version from the official website. This will automatically remove the previous version of git before installing the new one.
After installing, check you are up to date, by running git --version again.
Creating a repo
To create a repo, go to the directory you wish to make a git repo. In the terminal, run:
git initThis will initialise a git repo in that directory.
You can see a .git folder in directories managed with git.
A .git folder will be created, which Windows does not show you by default. I recommend checking the setting "show hidden files / folders" in the Windows file explorer to be able to see .git folders. This makes it easier, when using the file explorer GUI, to tell which directories are git repos, and which are not.
In Linux, you can view it using ls -a.
You can check whether your git repo was correctly initialised by running:
git statusIf you wish to change a local directory to not be managed by git, simply delete the .git folder for that directory.
Making changes
In order to save changes, you must first choose which files within the git repo you want to save. You can select all by using:
git add .or choose specific files to stage with:
git add filenameOnce files have been "added", they are staged.
Staged files can be committed by using:
git commit -m "commit message"If, after staging certain files, you decide you do not want to commit them, you can unstage them with:
git resetto unstage all staged files, or:
git reset filenameto unstage specific files.
You can commit without making any changes (to mark a specific version / milestone) if you wish, using:
git commit --allow-empty -m "commit message"Syncing with GitHub
It is useful to sync our git repos with external services such as GitHub. This is mainly for collaboration (but you can use it like I sometimes do, to 'sync' between different devices without using a cloud service).
Creating a GitHub repo
If you want to create a repo on GitHub, I usually create it on the GitHub website. Then, in the directory which I want to upload, I run git init (if not already initialised), and commit any changes if applicable. Then:
git remote add origin {link to GitHub repo}and finally:
git push -u origin masterYou can always view your remote origins using:
git remote -vRemove a remote origin using:
git remote remove originCloning a repo
If a repo exists on GitHub, you can clone it to your device using:
git clone https://github.com/username/repo_namegit clone [email protected]:username/repo_name
You can also clone a remote repo into a pre-existing local folder using:
git clone [email protected]:username/repo_name my_local_folderUploading commits
To upload any local changes to GitHub, first commit, then:
git pushCreating a pull request (PR)
A pull request is a request to merge changes you made to a different branch or repo. Put more simply, it is a request to push changes you made on one branch to another branch. The changes will be reviewed, and may (or may not) be merged.
In order to create a pull request on GitHub, follow these steps:
- Fork the repository you wish to make changes to. This will create a "copy" (fork) of that repository, owned by you.
- Clone the fork you just created, using
git clone your_forked_repo_url. - Set up a remote upstream. This will allow you to sync changes from the original repository. In the directory of the forked repo, run
git remote add upstream original_repo_url. - Update your local repository:
git fetch upstream git merge upstream/main - Create and switch to a new branch, using
git checkout -b new_branch_name. - Make and commit your changes.
- Push these changes to your forked repository, using
git push origin new-branch-name. - Go to your forked repository on GitHub, where you will see a prompt to create a pull request. Fill in the necessary details, and create the PR.
GitHub credential management
To clone / make changes to private GitHub repositories, you must be signed in. GitHub no longer supports password-based authentication, so you can use either a personal access token (PAT) or authenticate using SSH (which I recommend).
PAT:
In order to create a PAT, go to the GitHub tokens page. Here, you can view any tokens already active for your account, or create new ones.
Once you have a PAT, when prompted to sign in, enter your username as your username, and the PAT as your password.
In order to avoid entering your PAT on every login prompt, use git config --global credential.helper store. After your first successful login, this will store your login credentials.
SSH:
If you want to use SSH instead, the first step is to create an SSH key see this section.
Once you have an SSH key pair, go to your GitHub settings, and navigate to your SSH keys section (https://github.com/settings/keys). In this section, you can add your SSH key with the option "New SSH key". Simply add your public key, and you're good to go.
https://github.com/username/repo
you should instead use
[email protected]:username/repo
This applies for git clone {url}, and anywhere else you would normally input the repo url.
gitignore
We don't always want to upload everything to GitHub, whether that's because we have some sensitive files (API keys for instance), or because we have a bunch of .exe or .vscode files.
We can specify which particular files, or which types of files do not get managed by git in the .gitignore file.
Here is an example .gitignore file:
.exe
.vscode
testing/
someAPIkey.txt
Alternatively, you can choose to ignore everything by default, and selectively add files to track using a ! prefix:
*
!main.py
!images/
!README.md
!.gitignore
git config
Every commit has a name and email attached.
- to view user name:
git config --global user.name - to set / change user name:
git config --global user.name "{yourName}" - to view user email:
git config --global user.email - to set / change user email:
git config --global user.email "{yourEmail}"
SSH
Generating SSH keys
To generate an SSH key pair, run:
ssh-keygen -t ed25519 -C "[email protected]"You can simply press Enter when prompted to accept the default location and filename.
By default, this will create a .ssh folder in your home directory, which contains 2 files.
id_ed25519: this is your private keyid_ed25519.pub: this is your public key
If you see these have been created, then you have succesfully generated an SSH key pair.
ls -a instead of ls in order to see the .ssh folder. You can always navigate to it with cd ~/.ssh
Using SSH
When authenticating using SSH, you will need to provide your public key to whichever service you are authenticating with (remote server, GitHub, etc...). "Providing" the key usually consists in copy-pasting it from your .pub file. Once your public key has been stored, your matching private key will effectively be your password.